For home and small mining environments, the hardware truly needed is not complicated: a miner that matches the algorithm, a stable PSU, appropriate cooling, and auxiliary accessories, etc. Taking Small ASIC Miner as an example, a single device may only be in the 20W–600W range, while high-performance ASICs may exceed 3000W. Therefore, hardware selection should not only look at hashrate, but also at power supply specifications, interfaces, current stability, and cooling methods.
1. Hash Core: ASIC Miners, GPU & CPU
The essence of the hash core is to turn every inch of the silicon wafer into a battlefield for hash computation. The core of mining hardware is actually one sentence: let the right chip continuously process the right algorithm. ASICs, GPUs, and CPUs all look like "computing devices," but their working logic is completely different. Taking Bitcoin's SHA-256 algorithm as an example, ASICs are designed directly around a specific algorithm, with a more dedicated computing path; GPUs are more flexible and can switch algorithms through different mining software; CPUs are more like a Swiss Army knife, capable of doing everything, but not good at most dedicated ASIC algorithms.
If home users aim for Bitcoin, they usually prioritize ASIC Miners. For example, in 2026, a small single-core BM1373 ASIC miner can provide about 2.5 TH/s of hashrate, while large devices can reach hundreds of TH/s. The key here is not "the bigger the number, the better," but whether the chip architecture matches SHA-256, whether the control board supports stable operation, and whether the cooling system can continuously keep the chip temperature down. During actual debugging, I focus more on three data points: Hashrate, frequency, chip temperature, rather than just staring at the peak hashrate on the web page.
The advantage of GPUs lies in flexibility. Taking high-end GPU platforms in 2026 as an example, video memory, PCIe 4.0/5.0 interfaces, video memory temperature, and driver compatibility will directly affect actual performance. CPU mining is more inclined towards specific algorithms, such as RandomX, which is CPU-friendly. In other words, hardware selection should first look at the algorithm, then the device, rather than installing a "very powerful" GPU as soon as you see it.
| Hardware | Typical Positioning | Key Parameters | Suitable Scenarios |
|---|---|---|---|
| ASIC | Dedicated Computing | TH/s, J/TH, frequency, chip temperature | Specific PoW algorithms such as Bitcoin |
| GPU | General Parallel Computing | Video memory, core frequency, power consumption, temperature | Multi-algorithm experiments and GPU mining |
| CPU | General Computing | Number of cores, threads, memory, temperature | CPU-friendly algorithms |
If the device's promotional parameters state "up to 20 TH/s," do not directly treat 20 TH/s as the daily operating value. First confirm the test frequency, firmware version, ambient temperature, and cooling conditions. At the safety level, you should also check whether the PCB, connectors, and power interfaces comply with corresponding safety standards. For North American home environments, the power system should at least pay attention to UL certification, input voltage range, and overcurrent protection; when using USB or low-voltage small miners, also confirm that the adapter's output specifications are consistent with the device.
2. Standard + High-Specification PSU
When many beginners choose a miner, they look at the chip, the fan, and the casing, but the PSU is like an NPC forgotten in the corner. In fact, the PSU is the "heart" of the entire system. What miners fear most during operation is not insufficient rated power, but unstable output under continuous load, instantaneous voltage drop, interface heating, and incomplete protection mechanisms. A 300W-class device and a 3000W-class ASIC have completely different requirements for the PSU.
Home small devices can be matched according to the device's rated input power. For example, if the device is rated at 250W, you can prioritize selecting a reliable 300W–400W+ mining experimental-grade power supply with a reasonable margin; if the miner runs in the 400W–450W range for a long time, it is not recommended to let a power supply that is "just 450W" work near its upper limit for a long time. The PSU needs to focus on three data points: rated power, 12V output capability, efficiency rating, while confirming that the power cord, DC interface, or PCIe interface can withstand continuous current.
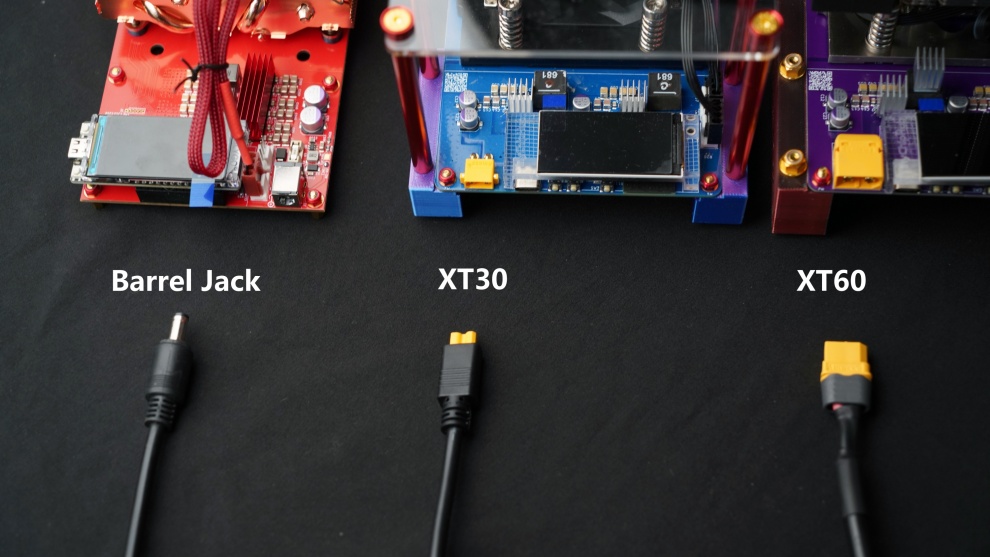
There is also a very easy pitfall here: rated wattage is not everything. Even if both are marked 1000W, the 12V output capability, ripple control, temperature protection, and transient response of two PSUs may be completely different. ATX systems usually involve the ATX 3.x specification, while some ASICs use manufacturer-specific power solutions. Don't assume "it will work if plugged in" just because the interfaces look the same. In the mining world, the fact that an interface can be plugged in does not mean it should be plugged in.
- Step 1: Confirm the miner's input voltage, such as 110V, 120V, or 220–240V.
- Step 2: Confirm the device's continuous power, such as 250W, 450W, or 3000W class.
- Step 3: Check the 12V output, current capability, and corresponding interface specifications.
- Step 4: After the first startup, observe the temperature rise of the power interface, cables, and plugs.
During actual testing, I will simultaneously record input voltage, device power, connector temperature. For example, for a 450W-class miner running in an environment with a room temperature of about 23°C for 30 minutes, if the device power is stable, but the local temperature of the power connector is significantly higher than the surrounding environment, it is necessary to immediately check the cable crimping and contact resistance. A power meter showing 450W does not mean all locations are "safe and unnoticeable."
For small ASICs, prioritize stability, quietness, and interface matching; for high-power ASICs, prioritize continuous output and protection capabilities; for DIY platforms, focus on ATX specifications, PCIe power supply, and cable specifications. For North American users, you should also prioritize power products with safety certifications such as UL and ETL, and avoid using second-hand high-power PSUs of unknown origin.
3. Passive, Air Cooling & Liquid Cooling Solutions
Cooling is not an "additional feature" of the miner, but part of the computing system. ASIC chips generate heat when converting electrical energy into computing power. For home devices, I usually divide cooling methods into three levels: passive cooling, active air cooling, liquid cooling. Which one to choose does not depend on "which sounds more advanced," but on device power, chip density, ambient temperature, and target operating frequency.
Passive cooling is the quietest and simplest. Aluminum or copper heat sinks increase surface area through fins, transferring the heat generated by the chip to the air. It is especially suitable for low-power devices, such as 20W–100W small ASICs. But when power enters 100W, 200W or even higher, relying solely on natural convection will obviously struggle. At this point, fans come into play.
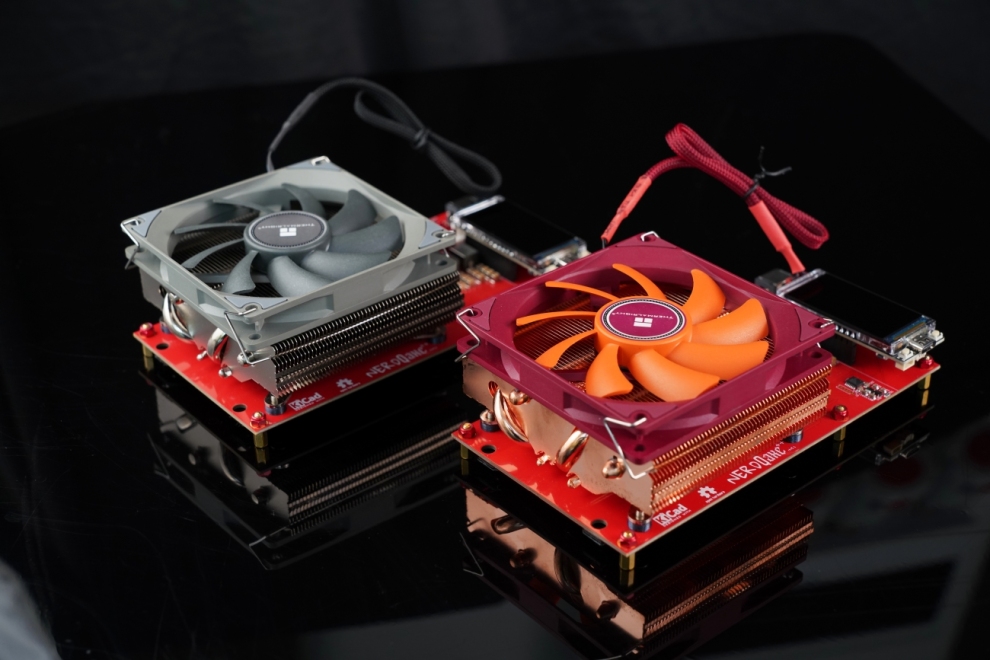
The core of air cooling is not "the miner fan the bigger the better," but whether the airflow path is complete. A 140mm fan that just blows into the case may be less effective than two 80mm fans forming a clear intake and exhaust path. In actual layout, you can design according to the direction of "cold air enters → passes through fins → hot air is exhausted." Recording ambient temperature, chip temperature, fan speed during testing is much more reliable than just listening to the fan noise.
| Cooling Method | Typical Power Range | Advantages | Main Considerations |
|---|---|---|---|
| Passive Cooling | About 20–100W | Low noise, simple structure | Depends on ambient air flow |
| Active Air Cooling | About 100–1000W+ | Low cost, easy maintenance | Noise, dust, airflow |
| Liquid Cooling | High-density, high-power devices | Strong heat exchange capability | Complex system, requires leak-proof design |
Liquid cooling is another set of logic. Water cooling or other liquids transfer heat away through cold plates, pumps, and radiators, suitable for high heat density devices. Further, there is dielectric liquid immersion cooling, but this is no longer at the level of "buy a fan and install it" for ordinary home users. Liquid cooling systems must pay attention to flow rate, liquid temperature, pump speed, while checking pipes, joints, and sealing status.
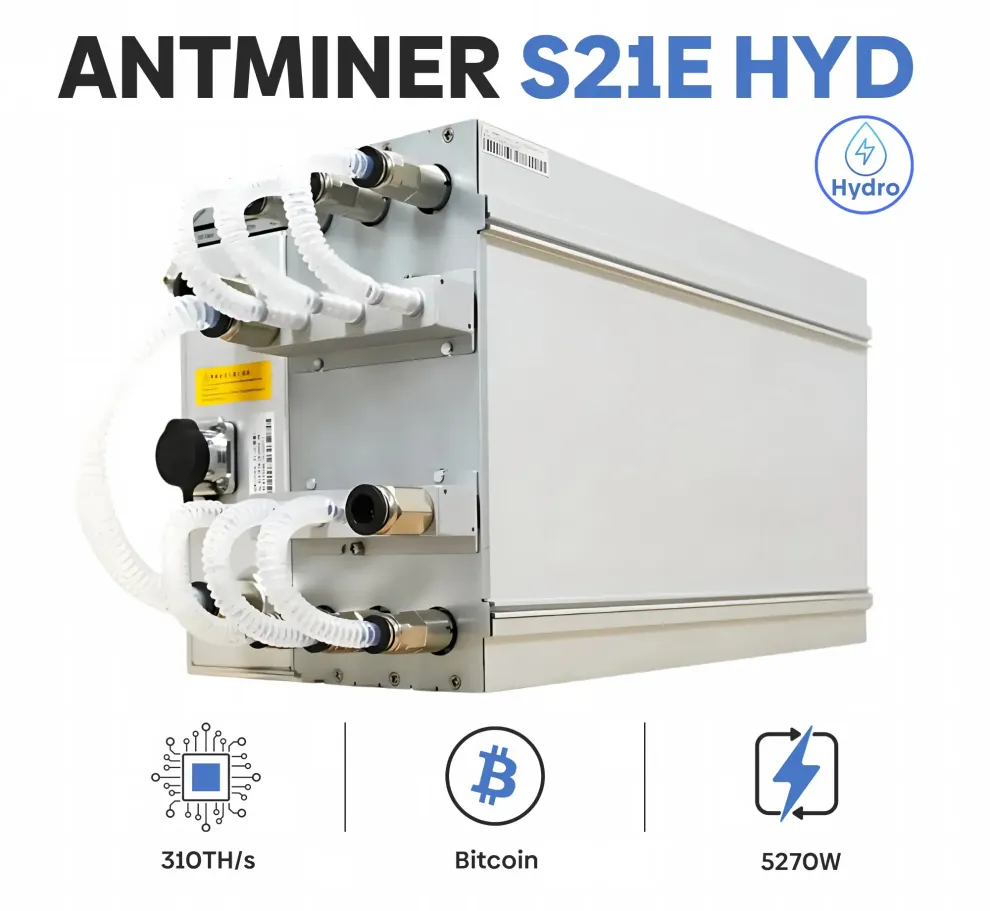
From a safety perspective, air-cooled devices should pay attention to fan bearings, dust accumulation, and blockages; liquid-cooled devices should focus on leakage risks. For DIY miners, fans and pumps are continuously running components, so protection strategies can be established through PWM fan control, temperature thresholds, and automatic frequency reduction mechanisms. Some server-grade devices also adopt stricter redundant fan designs.
4. Secure & Efficient Mining Accessories
After the miner actually starts running, you will find that chips, cooling, and power supply are only half of it. The other half is those inconspicuous but essential mining accessories: screens, 3D brackets, acrylic panels, specific power cords, and various connectors. For home and DIY miners, these things are not "decorations." They determine how the device is placed, viewed, and connected, and also directly affect the convenience of daily maintenance.
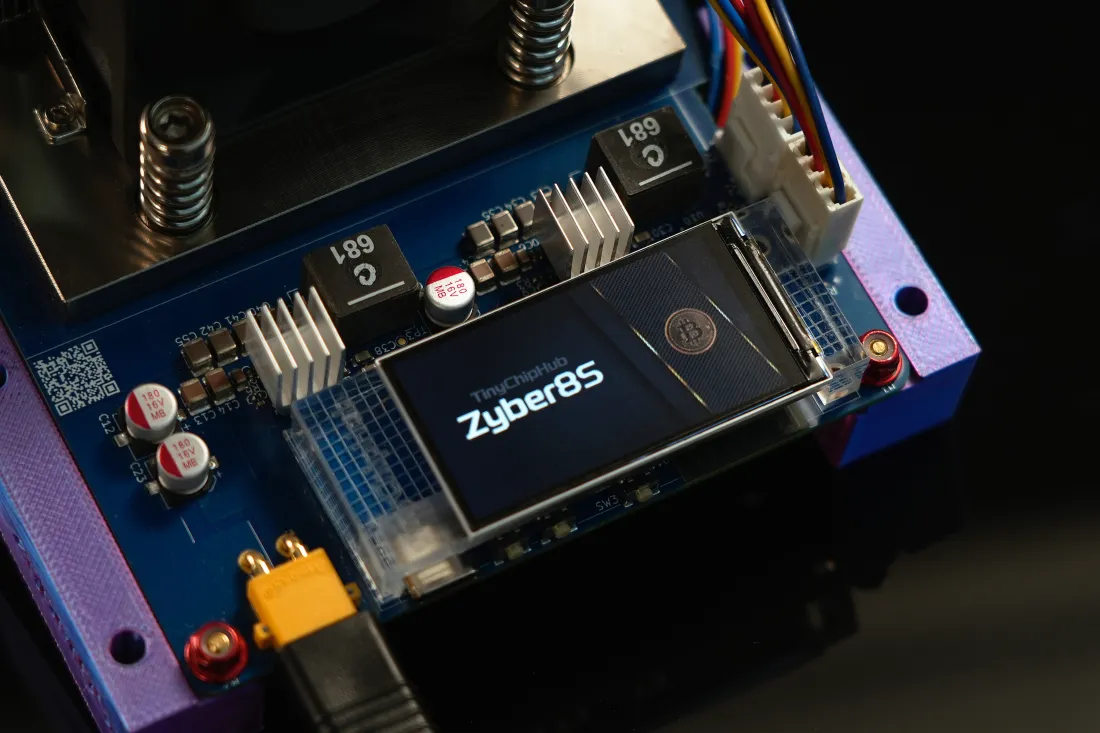
Let's talk about the display screen first. One of the biggest features of small ASIC Miners is that the device itself is very small, but there are many operating states. Hashrate, temperature, frequency, fan speed, connection status are all worth checking at any time. If you have to open a computer and enter the background every time you adjust parameters, the experience is somewhat like removing the engine before driving. A status display screen of only a few inches can place core data directly next to the miner. For DIY devices, USB power supply, low-power display, and local web interface are very practical combinations.
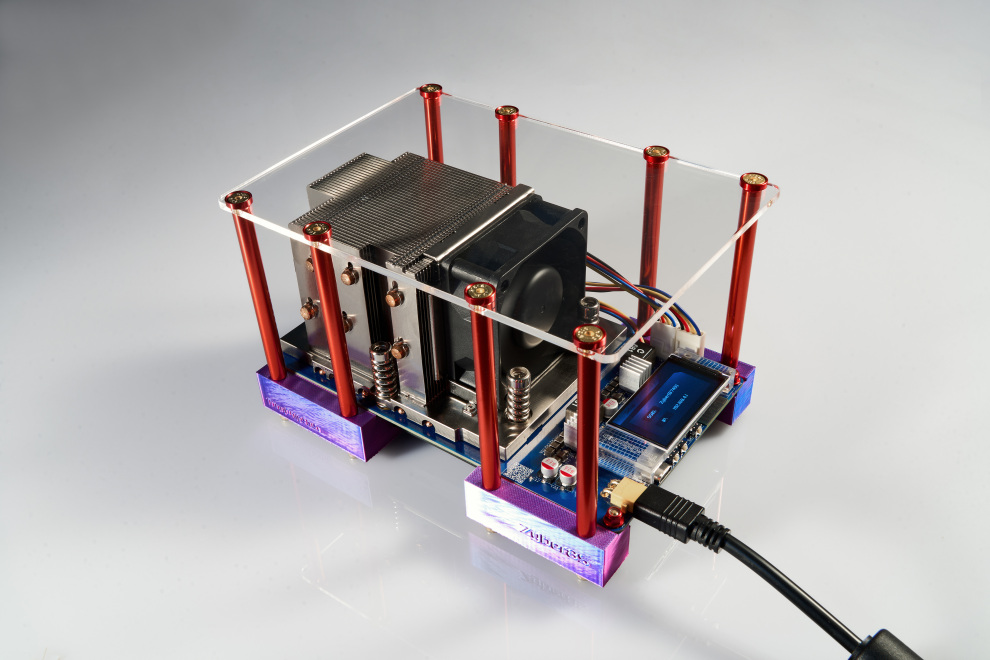
When testing small miners, I prioritize observing three core indicators: Hashrate, chip temperature, frequency. For example, a Solo Miner with about 2.5 TH/s, if the screen can continuously display the current hashrate and temperature, then after adjusting overclocking parameters, changes can be seen within seconds to tens of seconds. Compared to repeatedly opening the computer background, this "glanceable" feedback method is obviously more suitable for desktop-level devices.
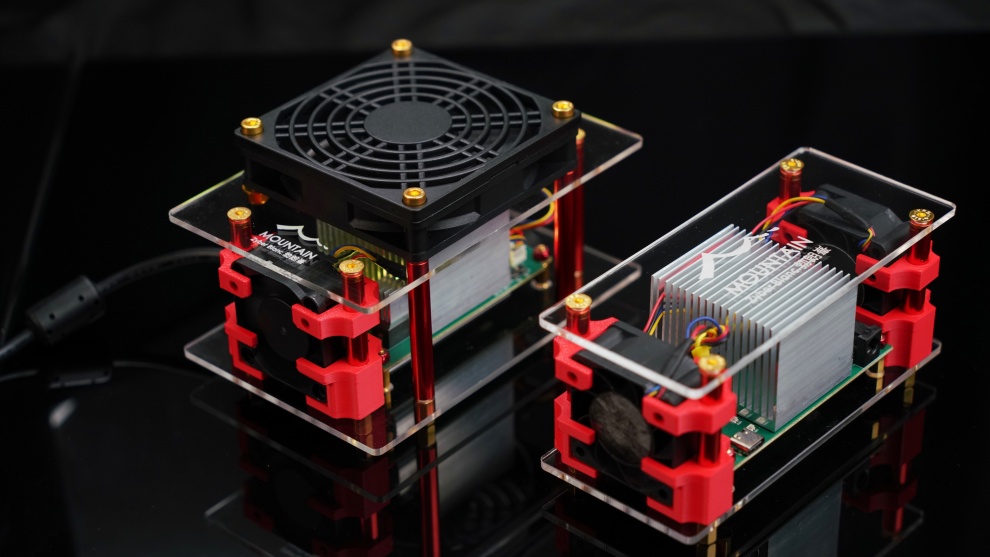
Brackets and structural parts solve another problem: how to turn a bare PCB into a device that can be used for a long time. 3D printed brackets are usually suitable for quick DIY, and can be customized according to PCB size, fan position, and interface direction; acrylic panels are more suitable for display devices, and the transparent structure allows direct viewing of the PCB, heat sink, and chip layout. Neither is absolutely better; one leans toward functionality, the other toward structure and visuals.
| Accessories | Main Function | More Suitable Scenarios |
|---|---|---|
| Status Display Screen | Real-time viewing of hashrate, temperature, frequency | Desktop miners, DIY devices |
| 3D Printed Bracket | Fix PCB, fans, and connectors | DIY, prototype testing, custom structures |
| Acrylic Panel/Bracket | Protect and display internal structure | Desktop display, transparent case |
| Dedicated Power Cord | Match device interface and current specifications | ASIC, custom miners |
| Screws and Anodized Pillars | Fix PCB and structural parts | Open-air miners, modular DIY |
The most easily underestimated are dedicated power cords and connectors. Different miners may use DC, PCIe, or manufacturer-customized interfaces. Even if the interface appearance is similar, you cannot assume that the voltage and pin definitions are completely consistent. For example, in a 12V power supply system, a 10A current corresponds to an input power of about 120W; when the device enters the 300W, 450W or even higher power range, wire cross-sectional area, contact resistance, and connector rated current all become more important.
- First confirm the interface: Check the interface types of the miner, power supply, and cables.
- Then confirm specifications: Verify voltage, current, and polarity; don't just look at the plug shape.
- Installation structure: Ensure sufficient spacing between the PCB and the bracket to avoid metal parts directly contacting the circuit.
- Check airflow: The bracket must not block the fan intake or the radiator exhaust direction.
- Operation test: After startup, observe interface temperature, screen data, and device status.
There is also a very interesting change: now small ASIC Miners are increasingly like "modular hardware", rather than black-box miners in the traditional sense. The PCB, fan, display screen, bracket, power supply, and control system can be upgraded separately. For example, replacing a higher-spec fan does not necessarily require replacing the entire device; adding a status screen does not necessarily require modifying the core computing board. This modular design is especially suitable for home users, because you can modify it bit by bit, rather than rebuilding the entire machine every time.
In terms of safety, structural parts cannot be chosen casually either. Acrylic panels need to avoid blocking the cooling airflow; 3D printed parts should pay attention to the material's temperature resistance range and fixing strength; when it comes to power connections, wires and connectors that comply with corresponding electrical standards should be used. For North American users, power accessories can prioritize safety certifications such as UL and ETL, while DIY structural parts should pay more attention to insulation, flame retardancy, and mechanical fixing ability. Certification solves product compliance issues, while correct installation solves actual use problems; the two cannot be confused.
A good small miner accessory system should make the device easier to see, easier to assemble, and easier to maintain. The screen is responsible for information feedback, the bracket for structural fixation, the acrylic for protection and display, the dedicated power cord for reliable connection, and the screws and pillars truly combine these modules. In the DIY ASIC ecosystem of 2026, the significance of these accessories is no longer just "miner peripherals," but rather turning a bare PCB into a complete hardware system truly suitable for desktop use, long-term operation, and continuous modification.